Instructions for Downloading SQL Server and Creating the Course Database and Tables
Note: Click on Creating the Course Database and Tables for instructions on Creating the Course Database and Tables.
Download SQL Server 2022:
Courses:
Introduction to SQL
Intermediate SQL
Download SQL Server 2022:
https://www.microsoft.com/en-us/sql-server/sql-server-downloads
Scroll Down and Click on "Download Now" under the "Express" Edition
Click Run on the popup that appears at the bottom of your interface. Or click Yes when it asks if you want to install the app.
Choose the Basic install and Accept the license terms.
Next, Install the software.
Click the Install SSMS button to install SQL Server Management Studio.
An Internet site will open up.
Click on the 'Free Download for SQL Server Management Studio (SSMS)' link.
Note: The name of the link above may be slightly different due to Microsoft revisions of the free software.
SSMS-Setup-ENU.exe will begin downloading.
Click on the file (SSMS-Setup-ENU.exe) after it is finished downloading to Install the program.
Restart your computer after installing SQL Server if your computer does not restart automatically.
Open SQL Server Management Studio
To begin using the program, open SQL Server Management Studio under Programs, on your computer or use the Search feature of your computer to locate SQL Server Management Studio.
Type the following in the Search box: Microsoft SQL Server Management Studio. Depending on your operating system this procedure may vary. Basically, you need to locate and open SQL Server Management Studio on your computer and click CONNECT.

(Optional Video) - Click Link: "https://youtu.be/Br8sk1jguQY
Connecting to your Server
When SQL Server Management Studio opens your local server name should be automatically listed in the Server Name field. Next, Click the Connect button.
If you do not see your local server name listed in the Server Name field, try the following to add your Local Server Name.
Click the down arrow, and click on "Browse for more"
Next, click on the Local Servers tab and click and open the "Database Engine" folder then Click on the name of your server from the list and click OK.
For example: ALLISON\SQLEXPRESS
Note: If you have connection issues, make sure that you are signed on to the computer as the administrator before opening SQL Server. This means that you are not logged in as a user with limited privileges. This is only if you have more than one login setup for your computer.
To ensure the above: Right Click on the Program name (SQL Server Management Studio) under your Windows Programs and select "Run as administrator".
Note: To resolve other connection issues, complete the following:
Go to the Start menu -> Control Panel -> Administration Tools -> Services.
In the list of Services scroll down and locate SQL Server (instance name, by default it is SQLEXPRESS) and check its status, it must be Started (if it is not started, then right click on SQL Server (SQLEXPRESS) and select Start from the context menu).
Tip: If you have any problems locating Administration Tools or Services use the Search feature of your computer to search for Administration Tools.
Creating the Course Database and Tables.
Note: Be sure to follow each of these steps exactly to avoid errors. Make sure that you create a completely new database in the instructions below.
DO NOT attempt to use an existing database.
Creating the Database
Note: Following is a quick method to Create the Course Database and Tables. You will basically create a name for your database and then copy, paste, and execute SQL script once to create and populate your tables with data simultaneously. It is a pretty quick process.
(Optional Video) - Click Link: https://youtu.be/um_So5nAi_8
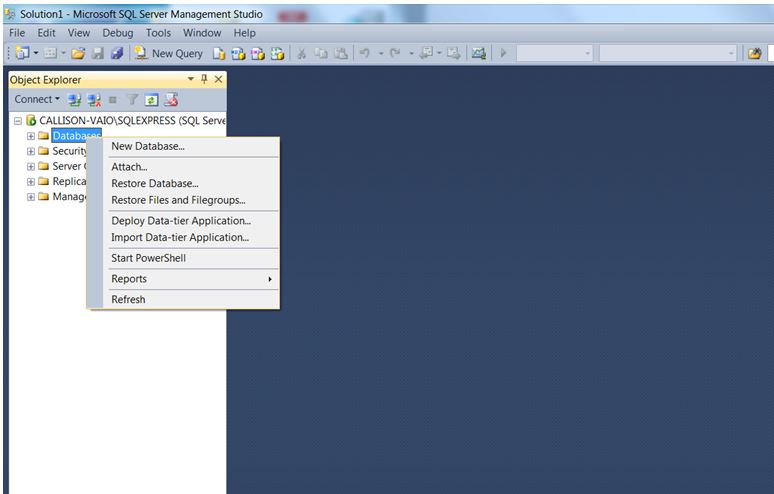
After you Connect in SQL Server Management Studio. Look to the left for a folder named Databases. Right click on the Databases folder and select "New Database". (See image below.)
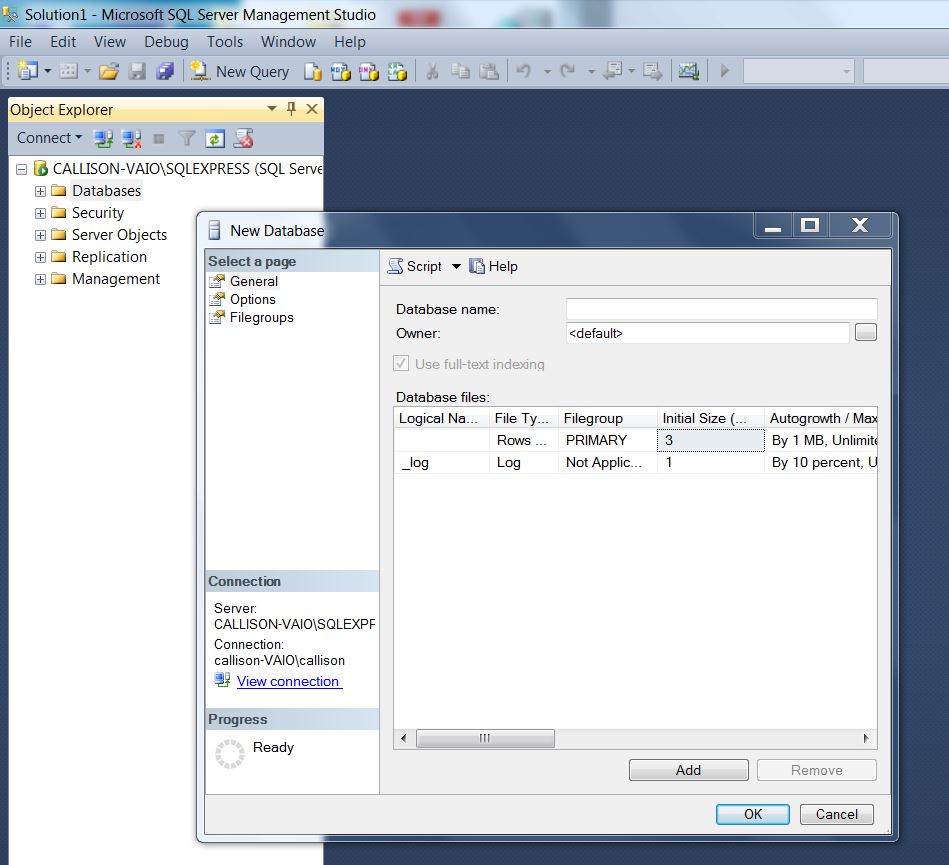
Type the name of your database in the Database Name field and then click the OK button. (See image below.)
Following are examples of potential database names: IntroductionToSQL, IntermediateSQL, AdvancedSQL
Next, click the "New Query" button. (See image below.)
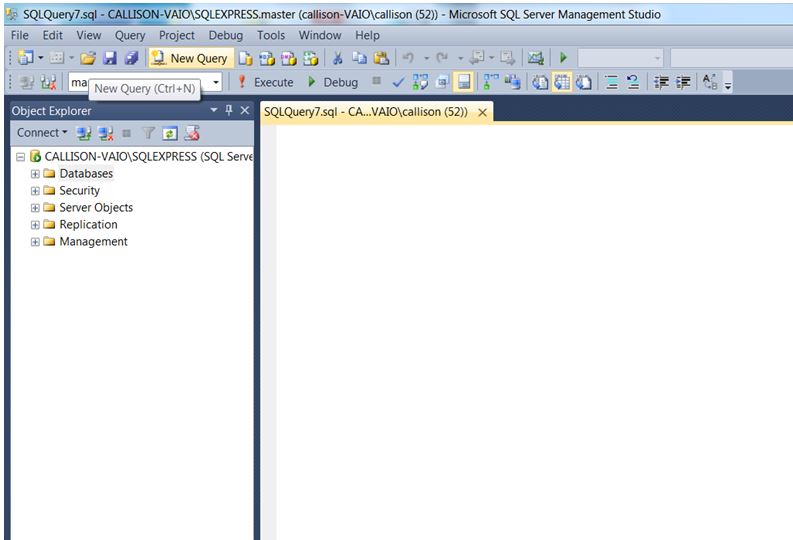
Next, select your Database from the "drop down box" near the top. (Instructions below.)
To select a database in SQL Server use the drop-down list menu near the top of the screen. The default database is usually set to master. Use the drop-down menu to select the database that you created above. (See image below.)
After your database is created and selected, you may execute the SQL script provided below to create and populate your tables. Please proceed to the instructions below.

Creating and Populating the Tables
NOTE: Your database must already be created before proceeding with this step. (See above.)
The SQL script to create and populate your tables must be executed in the white space provided on the right hand side of the SQL Server Management Studio interface. (See image below.)
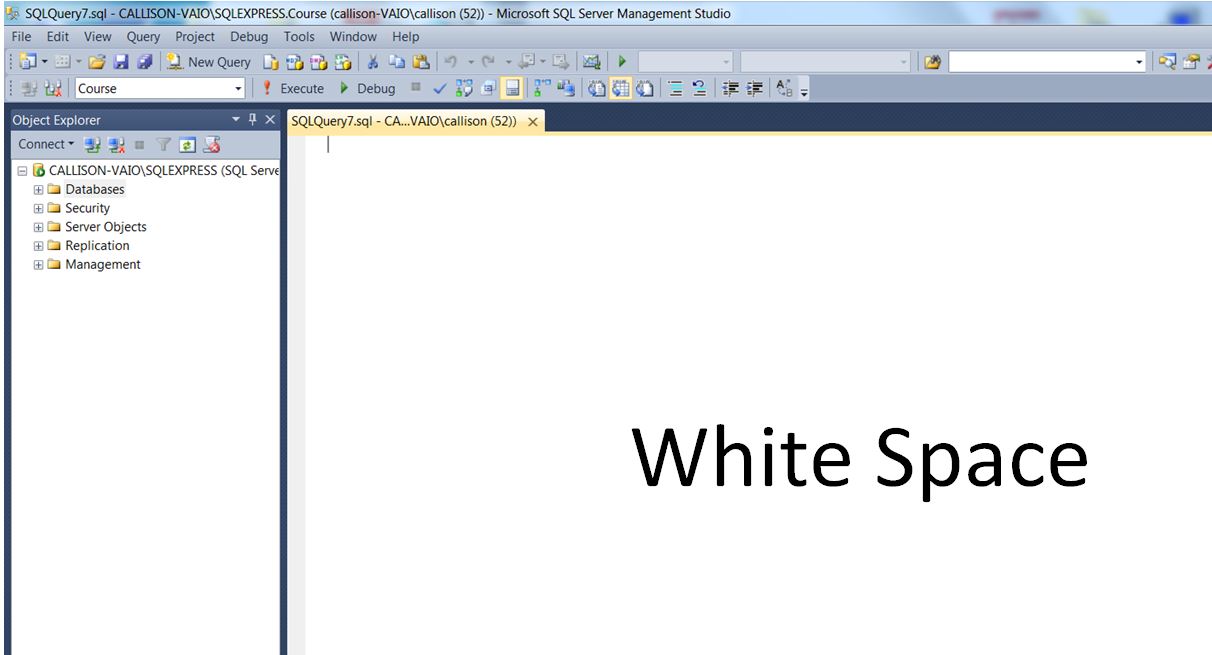
To create and populate the Customer, Orders, ServicePlans, and Customer2 tables in SQL Server, Click on the link (SQL Server SQL Scripts) further below and Copy, Paste and Run (Execute) all of the SQL code (everything in the file) located in the link below in your already created SQL Server database. Execute all (everything in the file) of the script at the same time.
Note: Do not execute (run) the SQL script more than once.
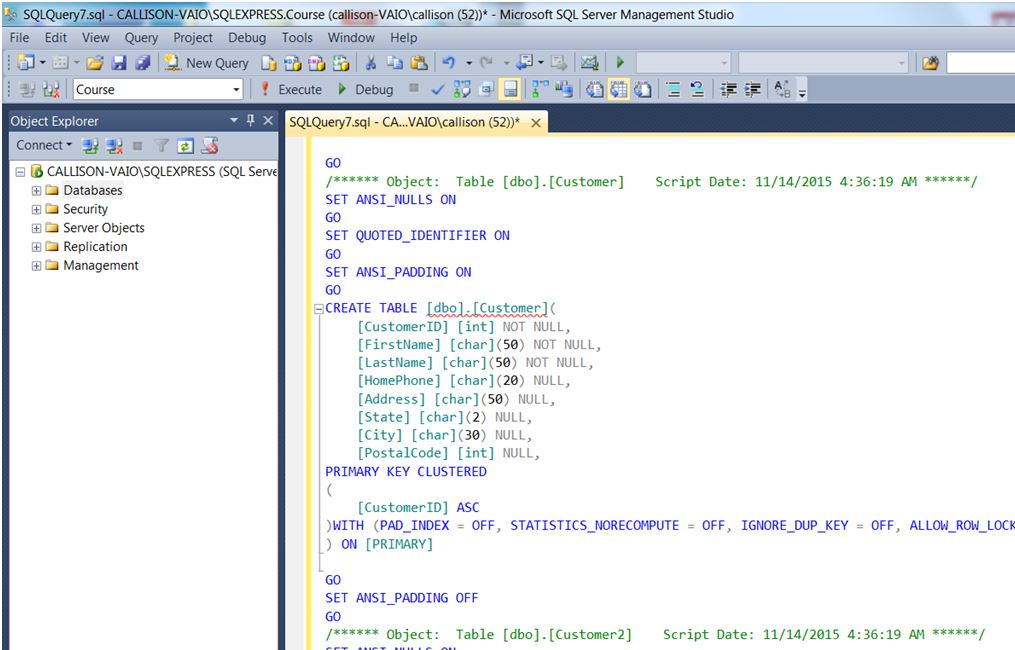
Once you Copy and Paste the SQL code into the white space within SQL Server Management Studio click the Execute button once in SQL Server Management Studio to execute (run) the SQL code. (See image below.)
Note: Use "Ctrl + A" (or Cmd + A on macOS) to Easily "SELECT ALL" of the content on the link below.
After executing the script you will receive messages stating 1 row affected. This message is fine. It means that the statements were completed successfully.
When you finish, you should have one database containing four tables.
Proceed to the Viewing Tables section Below to view tables.
Viewing Tables
NOTE: Delete all of the script from the screen before completing the below instructions.
To view or open any table, type the following script (Replace the table name in the script to view different tables).
For example, to view the Customer table, type the following script: (See image below.)
SELECT *
FROM Customer;
Click the Execute button to execute (run) the SQL script.

Note: You will execute all of the SQL examples from the course in this interface (White space on the right hand side of SQL Server Management Studio).
